Here we will explain to you how to create a custom post type with a category and extra fields in WordPress. This tutorial will help for making the custom post type so you can generate your posts with categories and show them on the front page.
Step 1)
Below is the code where you can create a custom post type with a category.
<?php
add_action( 'init', 'create_slider' );
function create_slider() {
register_post_type( 'slider',
array(
'labels' => array(
'name' => 'Slider',
'singular_name' => 'Slide',
'add_new' => 'Add New',
'add_new_item' => 'Add New Slide',
'edit' => 'Edit',
'edit_item' => 'Edit Slide',
'new_item' => 'New Slide',
'view' => 'View',
'view_item' => 'View Slide',
'search_items' => 'Search Slider',
'not_found' => 'No Slider found',
'not_found_in_trash' => 'No Slider found in Trash',
'parent' => 'Parent Slide'
),
'public' => true,
'menu_position' => 15,
'supports' => array( 'title', 'editor', 'thumbnail' ),
//'taxonomies' => array( '' ),
//'menu_icon' => plugins_url( 'images/image.png', __FILE__ ),
'has_archive' => true
)
);
}
function slider_taxonomy() {
register_taxonomy(
'slider_category', //The name of the taxonomy. Name should be in slug form (must not contain capital letters or spaces).
'slider', //post type name
array(
'hierarchical' => true,
'label' => 'Slider category', //Display name
'query_var' => true,
'rewrite' => array(
'slug' => 'slider_cat', // This controls the base slug that will display before each term
'with_front' => false // Don't display the category base before
)
)
);
}
add_action( 'init', 'slider_taxonomy');
function add_post_format_filter_to_slider_dropdown($query){
if (function_exists('custom_post_type_filter_dropdown')) {
$cur_post_type = 'slider';
custom_post_type_filter_dropdown($cur_post_type,'slider_category',$query);
}
}
add_action('restrict_manage_posts','add_post_format_filter_to_slider_dropdown');
function add_post_format_filter_to_slider($query){
if (function_exists('custom_post_type_filter')) {
$cur_post_type = 'slider';
custom_post_type_filter($cur_post_type,'slider_category',$query);
}
}
add_action('pre_get_posts','add_post_format_filter_to_slider');
function slider_type_columns( $taxonomies ) {
$taxonomies[] = 'slider_category';
return $taxonomies;
}
add_filter( 'manage_taxonomies_for_slider_columns', 'slider_type_columns' );
add_action('init','add_custom_meta_boxes');
function add_custom_meta_boxes(){
add_action( 'add_meta_boxes', 'slide_heading_meta_box_add' );
add_action( 'save_post', 'slide_heading_meta_box_save' );
}
function slide_heading_meta_box_add()
{
add_meta_box( 'slide_heading', 'Custom URL/Heading', 'slide_heading_meta_box', 'slider', 'normal', 'high' );
}
function slide_heading_meta_box()
{
$custom_metas = get_post_custom( $post->ID );
$slide_url = isset( $custom_metas['slide_url'] ) ? esc_attr( $custom_metas['slide_url'][0] ) : '';
$slide_heading = isset( $custom_metas['slide_heading'] ) ? esc_attr( $custom_metas['slide_heading'][0] ) : '';
$heading_color = isset( $custom_metas['heading_color'] ) ? esc_attr( $custom_metas['heading_color'][0] ) : ''; ?>
<p>
<label for="fom_link3">URL: </label>
<input type="text" name="slide_url" id="slide_url" value="<?php echo $slide_url; ?>" size="34" />
<label for="fom_link3">Heading: </label>
<input type="text" name="slide_heading" id="slide_heading" value="<?php echo $slide_heading; ?>" size="34" maxlength="50" />
<label for="fom_link3">Color: </label>
<input type="text" name="heading_color" id="heading_color" value="<?php echo $heading_color; ?>" size="5" maxlength="10" />
</p><?php
}
function slide_heading_meta_box_save($post_id){
// Bail if we're doing an auto save
if( defined( 'DOING_AUTOSAVE' ) && DOING_AUTOSAVE ) return;
// if our current user can't edit this post, bail
if( !current_user_can( 'edit_post' ) ) return;
// now we can actually save the data
$allowed = array();
// Make sure your data is set before trying to save it
if( isset( $_POST['slide_url'] ) ) {
update_post_meta( $post_id, 'slide_url', $_POST['slide_url'] );
}
if( isset( $_POST['slide_heading'] ) ) {
update_post_meta( $post_id, 'slide_heading', $_POST['slide_heading'] );
}
if( isset( $_POST['heading_color'] ) ) {
update_post_meta( $post_id, 'heading_color', wp_kses( $_POST['heading_color'], $allowed ) );
}
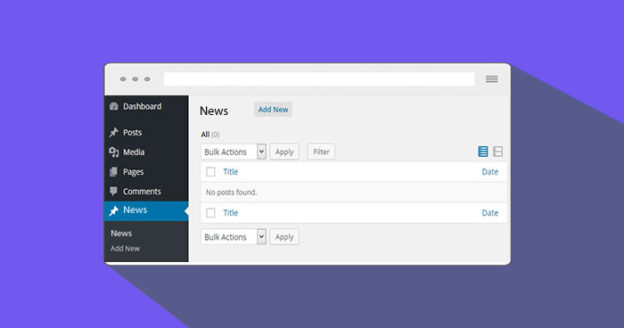
}Step 2)
Now visit the admin side, and you can see your custom post type with the category and extra fields there.