Category Archives: PHP

How to get image from youtube and vimeo embedded url?

This tutorial is for getting the image from YouTube and Vimeo embedded URLs using the PHP code without any 3rd party tools. You can just enter the embedded URL in the below code and get an HD image from these two platforms.

Step 1)

Just put this code in your PHP file where you want to get the YouTube and Vimeo embedded URL image in high resolution.

$url2 = "Your youtube and vimeo embedded url here";
$parsed     = parse_url($url2);
$hostname   = $parsed['host']; 
$path       = $parsed['path']; 
if(!empty($hostname)){
  if($hostname=='www.youtube.com' || $hostname=='youtube.com'){
	preg_match('%(?:youtube(?:-nocookie)?\.com/(?:[^/]+/.+/|(?:v|e(?:mbed)?)/|.*[?&]v=)|youtu\.be/)([^"&?/ ]{11})%i', $url2, $match);
	$youtube_id = $match[1];
        $videoID = substr($youtube_id,0,11);
        $video_image_src = "https://i.ytimg.com/vi/".$videoID."/maxresdefault.jpg";
	$video_image_href = "https://www.youtube.com/embed/".$videoID;
}else if($hostname=='player.vimeo.com'){
	preg_match("/vimeo\.com\/(\w+\s*\/?)*([0-9]+)*$/i", $url2, $output_array);
	$vimdeoIDInt = intval($output_array[1]);
	$vimeo = unserialize(file_get_contents("http://vimeo.com/api/v2/video/$vimdeoIDInt.php"));
	$small = $vimeo[0]['thumbnail_small'];
	$medium = $vimeo[0]['thumbnail_medium'];
	$large = $vimeo[0]['thumbnail_large'];
        $video_image_src = $large;
	$video_image_href = "https://player.vimeo.com/video/".$vimdeoIDInt; 
 }
echo $video_image_href;
}

Add Forfully Redirect http to https using php code without .htaccess

This tutorial is for redirecting the http URL to https using the PHP code if your .htaccess will not work for the SSL. It will just redirect all your HTTP URLs to HTTPS without using the .htaccess if your server HTTPS is not on. Just follow the step, and you can get your own redirection.

Step 1)

Just put this code in your main root file or connection file, which is included everywhere inyour project. So every time a URL is scanned with this code, if it finds the http, it will convert it into https.

if (!(isset($_SERVER['HTTPS']) && ($_SERVER['HTTPS'] == 'on' || 
   $_SERVER['HTTPS'] == 1) ||  
   isset($_SERVER['HTTP_X_FORWARDED_PROTO']) &&   
   $_SERVER['HTTP_X_FORWARDED_PROTO'] == 'https'))
{
   $redirect = 'https://' . $_SERVER['HTTP_HOST'] . $_SERVER['REQUEST_URI'];
   header('HTTP/1.1 301 Moved Permanently');
   header('Location: ' . $redirect);
   exit();
}

How to Generate Image from html using js?

This tutorial is about generating the image from the HTML. You can just create the HTML and put this code after your code, and it will generate the image from your HTML. Below is the easy step to generate the image from custom HTML.

Step 1)

Create one PHP file like index.php as below.

<meta charset="UTF-8">
<meta name="viewport" content="width=device-width, initial-scale=1.0">
<title>Html To Image</title>
<script src="https://ajax.googleapis.com/ajax/libs/jquery/1.11.2/jquery.min.js"> </script>
<script src="https://files.codepedia.info/files/uploads/iScripts/html2canvas.js"> </script>
<div class="bingo-box bingo-green generatedata" id="generatedata1" data-id="1">
<div class="number-row number-row1">
<div class="number number1">1</div>
<div class="number number2">2</div>
<div class="number number4">4</div>
<div class="number number5">5</div>
<div class="number number5">9</div>
</div>
</div>
<script>
        $(document).ready(function() {
            var getCanvas;
            $( ".generatedata" ).each(function( index ) {
                var dataid = $( this ).attr("id");
                var catid = $( this ).data("id");
                var datafid = parseInt(index) + parseInt(1);
                var element = $("#"+dataid);
                html2canvas(element, {
                    onrendered: function(canvas) {
                        getCanvas = canvas;
                        var imgageData = getCanvas.toDataURL("image/png");
                        var newData = imgageData.replace(/^data:image\/png/, "data:application/octet-stream");
                        $.ajax({
                          type: "POST",
                          url: "upload.php",
                          data: {
                             imgBase64: newData
                          }
                        }).done(function(o) {
                          console.log('saved');
                        });
                    }
                });
            });
        });
    </script>

Create another page like upload.php

<?php
$catid = $_POST['catid'];
$folderPath = "upload_img/";
$image_parts = explode(";base64,", $_POST['imgBase64']);
$image_type_aux = explode("image/", $image_parts[0]);
$image_type = $image_type_aux[1];
$image_base64 = base64_decode($image_parts[1]);
$filename = uniqid() . '.png';
$file = $folderPath . $filename;
file_put_contents($file, $image_base64);
?>

Step 3)

Now Just run the index.php file in your browser; this will generate the image in the folder.

Integrate Stripe API using php

If you need to integrate the Stripe API into your PHP project, then follow this tutorial, which can create/edit/update/delete charges, customers, subscriptions, plans, payments, cards, and many more. Just simply follow this step, and you can get your API working.

Step 1)

NOTE* : For this API integration, you need to enable the below modules in your Apache or live server.

  • curl, although you can use your own non-cURL client if you prefer
  • json
  • mbstring (Multibyte String)

Download the library from the official Stripe website and upload this Stripe demo library to your project.

Step 2)

Now make one test.php file to create a customer in Stripe using the API in PHP and include the below code in that file and save the file.

require_once('strip-demo/vendor/autoload.php');
$stripe = new \Stripe\StripeClient(<ENTER STRIPE KEY HERE>);
$customer = $stripe->customers->create('description' => '<CUSTOMER DESCRIPTION>','email' => "<CUSTOMER EMAIL ADDRESS>",'name' => "<CUSTOMER NAME>",
]);
$id=$customer->id;
print_r($customer); //get response from stripe when customer created in stripe
            
    $stripe = new \Stripe\StripeClient(<ENTER STRIPE KEY HERE>);
    $option = array("object" => 'card', "number" => "<CUSTOMER CARD NUMBER>","exp_month" => "CUSTOMER CARD MONTH","exp_year" => "<CUSTOMER CARD YEAR>","cvc" => "<CUSTOMER CARD CVV>");
    $card = $stripe->customers->createSource(
        $id,['source' => $option]);
        print_r($card_id); //get response from stripe when card created in stripe for specific user

    $data = $stripe->charges->create([
               'amount' => "1.00",
               'customer' => $id,
               'currency' => 'usd',
               'description' => 'Total Subscription Charges',
   ]);

print_r($data); //get response from stripe when charges created in stripe for specific user

Step 3)

Finally, run this test.php file in your system; it will send the data to your Stripe. For more API, visit this link: https://stripe.com/docs/api

How to implement firebase push notification in android and iphone

If you need to send a Firebase notification using PHP, then simply use these tutorials, which can help you send the notification to Android and iPhone devices. Basically there is a GCM (Google Cloud Messaging), which is sending the notification, but now Google has launched Firebase Cloud Messaging (FCM).

Step 1)

Generate the Firebase Server Key. For this you need to follow the below steps.

  • Log in to the Firebase Developer Console, and if you haven’t created a project yet, click “Create Project.”
  • Enter a project name, accept the Firebase terms, and press “CREATE PROJECT.”
  • Does it set up Google Analytics for your project? Select “Not Right Now” and press “CREATE PROJECT.”
  • The project will be created, and you will get the message “Your new project is ready.” Press the “Continue” button to redirect to your project dashboard page.
  • On the dashboard page, click the gear icon in the top left and select “Project settings.”
  • Go to the “Cloud Messaging Section” section, and you will have the server key.
  • Done! I hope you successfully generate a Firebase server key.

Step 2)

Create a file named fcm.php and add the below push notification PHP code. Be sure to replace the Your Firebase Server API Key Here with a proper one from the Google API’s Console page.

<?php
class FCM {
    function __construct() {
    }
   /**
    * Sending Push Notification
   */
  public function send_notification($registatoin_ids, $notification,$device_type) {
      $url = 'https://fcm.googleapis.com/fcm/send';
      if($device_type == "Android"){
            $fields = array(
                'to' => $registatoin_ids,
                'data' => $notification
            );
      } else {
            $fields = array(
                'to' => $registatoin_ids,
                'notification' => $notification
            );
      }
      // Firebase API Key
      $headers = array('Authorization:key=Your Firebase 
Server API Key Here','Content-Type:application/json');
     // Open connection
      $ch = curl_init();
      // Set the url, number of POST vars, POST data
      curl_setopt($ch, CURLOPT_URL, $url);
      curl_setopt($ch, CURLOPT_POST, true);
      curl_setopt($ch, CURLOPT_HTTPHEADER, $headers);
      curl_setopt($ch, CURLOPT_RETURNTRANSFER, true);
      // Disabling SSL Certificate support temporarly
      curl_setopt($ch, CURLOPT_SSL_VERIFYPEER, false);
      curl_setopt($ch, CURLOPT_POSTFIELDS, json_encode($fields));
      $result = curl_exec($ch);
      if ($result === FALSE) {
          die('Curl failed: ' . curl_error($ch));
      }
      curl_close($ch);
  }
}   
?>

Step 3)

Finally, create an index.php and add the below code. Before testing, please replace your device token with your real device token.

<?php
$regId ="Your Device Token";

// INCLUDE YOUR FCM FILE
include_once 'fcm.php';    

$notification = array();
$arrNotification= array();			
$arrData = array();											
$arrNotification["body"] ="Test by Ravi Sukhadia.";
$arrNotification["title"] = "TECHIBUCKET";
$arrNotification["sound"] = "default";
$arrNotification["type"] = 1;

$fcm = new FCM();
$result = $fcm->send_notification($regId, $arrNotification,"Android");
?>

Step 4)

Send Push Notification to iOS Using PHP. You just need to change “Android” to “IOS” in your index.php file. like below…

FOR ANDROID

$result=$fcm->send_notification($regId,$arrNotification,"Android");

FOR IPHONE

$result=$fcm->send_notification($regId, $arrNotification,"IOS");

Step 5)

Now run your index.php file, and you can get the notification on your devices.

Implement PHP mailer with smtp authentication

This tutorial is for implementing the PHP mailer with SMTP authentication. You can set SMTP authentication mail to your website using this. So simply follow the setup, and you can get working SMTP authentication mail.

Step 1)

Download the PHP mailer library from here. click here for download

Step 2)

Make a function for sending mail as below.

<?php 
use PHPMailer\PHPMailer\PHPMailer;
use PHPMailer\PHPMailer\Exception;
require 'PHPMailer/src/PHPMailer.php';
require 'PHPMailer/src/SMTP.php';
require 'PHPMailer/src/Exception.php';
$mail = new PHPMailer(true); // Passing `true` enables exceptions 
try { 
//Server settings 
$mail->SMTPDebug = 2; // Enable verbose debug output
$mail->isSMTP(); // Set mailer to use SMTP
$mail->Host = ''; // Specify main and backup SMTP servers
$mail->SMTPAuth = true; // Enable SMTP authentication
$mail->Username = "";
$mail->Password = "";
$mail->SMTPSecure = 'tls'; // Enable SSL encryption, TLS also accepted with port 465
$mail->Port = 587; // TCP port to connect to 
$mail->SMTPOptions = array(
    'ssl' => array(
        'verify_peer' => false,
        'verify_peer_name' => false,
        'allow_self_signed' => true
    )
);
//Recipients 
$mail->setFrom('Your SMTP Email Address', 'Your SMTP User Name'); //This is the email your form sends From 
$mail->addAddress('Your User Email Address', 'Your User Name'); // Add a recipient address
//Content 
//$mail->isHTML(true); // Set email format to HTML 
$mail->Subject = 'Your Subject';
$htmldata = "<html>
           <head>
           <title>Title Here</title>
           </head>
           <body>HTML Content</body></html>";
           $mail->IsHTML(true);          
$mail->Body = $htmldata; 
$mail->send(); echo 'Message has been sent'; 
} catch (Exception $e) { echo 'Message could not be sent.'; 
echo 'Mailer Error: ' . $mail->ErrorInfo;
}
?>

Step 3)

Now use the above function to send the SMTP authentication mail via SMTP.

Import data from excel file to php database

You have an Excel file, and if you want to import that Excel file to your database, then fetch the cell value using these tutorials. You can directly import to your MySQL, MS SQL, and various databases using this library and tutorials. Just download the library and integrate the below code there.

Step 1)

Download the Excel read library from here. click here for download

Step 2)

Make a form for uploading your Excel file as below.

<html>
<body>
    <form method="post" enctype="multipart/form-data">
        <table>
            <tr>
                <td>
                    Select File:
                </td>
                <td>
                    <input type="file" name="file" id="file">
                </td>
            </tr>
            <tr>
                <td colspan="2" align="left">
                    <input type="submit" name="submit" value="Submit">
                </td>
            </tr>
        </table>
    </form>
</body>
</html>

Step 3)

Now make code to read the Excel file cell and import it to the database as below.

<?php
include('PHPExcel-1.8/Classes/PHPExcel/IOFactory.php');

if(isset($_POST["submit"]))
{
	$inputFileName = $_FILES["file"]["tmp_name"];

	try {
		$inputFileType = PHPExcel_IOFactory::identify($inputFileName);
		$objReader = PHPExcel_IOFactory::createReader($inputFileType);
		$objPHPExcel = $objReader->load($inputFileName);
	} catch (Exception $e) {
		die('Error loading file "' . pathinfo($inputFileName, PATHINFO_BASENAME) . '": ' . 
		$e->getMessage());
	}

	$sheet = $objPHPExcel->getSheet(0);
	$highestRow = $sheet->getHighestRow();
	$highestColumn = $sheet->getHighestColumn();

	$newArr = array();
	for($row = 1; $row <= $highestRow; $row++) { 
		$rowData = $sheet->rangeToArray('A' . $row . ':' . $highestColumn . $row, null, true, false);

		array_push($newArr, $rowData);
	}

    echo "<pre>";
    print_r($newArr);
	
    echo "Record Update Successfully...";
}
?>

Step 4)

Now upload your Excel to the form and submit the Excel; it will return you all the cell values, which you will insert into your database.

How to create custom post type with category and extra fields?

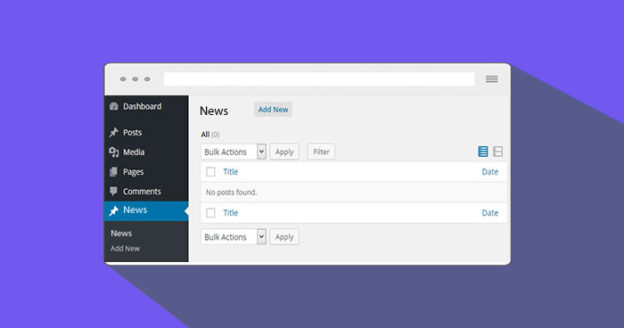
Here we will explain to you how to create a custom post type with a category and extra fields in WordPress. This tutorial will help for making the custom post type so you can generate your posts with categories and show them on the front page.

Step 1)

Below is the code where you can create a custom post type with a category.

<?php
add_action( 'init', 'create_slider' );
function create_slider() {
    register_post_type( 'slider',
        array(
            'labels' => array(
                'name' => 'Slider',
                'singular_name' => 'Slide',
                'add_new' => 'Add New',
                'add_new_item' => 'Add New Slide',
                'edit' => 'Edit',
                'edit_item' => 'Edit Slide',
                'new_item' => 'New Slide',
                'view' => 'View',
                'view_item' => 'View Slide',
                'search_items' => 'Search Slider',
                'not_found' => 'No Slider found',
                'not_found_in_trash' => 'No Slider found in Trash',
                'parent' => 'Parent Slide'
            ),
 
            'public' => true,
            'menu_position' => 15,
            'supports' => array( 'title', 'editor', 'thumbnail' ),
            //'taxonomies' => array( '' ),
            //'menu_icon' => plugins_url( 'images/image.png', __FILE__ ),
            'has_archive' => true
        )
    );
}

function slider_taxonomy() {  
	register_taxonomy(  
		'slider_category',  //The name of the taxonomy. Name should be in slug form (must not contain capital letters or spaces). 
		'slider',        //post type name
		array(  
			'hierarchical' => true,  
			'label' => 'Slider category',  //Display name
			'query_var' => true,
			'rewrite' => array(
				'slug' => 'slider_cat', // This controls the base slug that will display before each term
				'with_front' => false // Don't display the category base before 
			)
		)  
	);  
}
add_action( 'init', 'slider_taxonomy');

function add_post_format_filter_to_slider_dropdown($query){
	if (function_exists('custom_post_type_filter_dropdown')) {	
		$cur_post_type = 'slider';
		custom_post_type_filter_dropdown($cur_post_type,'slider_category',$query);
	}
}
add_action('restrict_manage_posts','add_post_format_filter_to_slider_dropdown');

function add_post_format_filter_to_slider($query){
	if (function_exists('custom_post_type_filter')) {
		$cur_post_type = 'slider';
		custom_post_type_filter($cur_post_type,'slider_category',$query);
	}
}	
add_action('pre_get_posts','add_post_format_filter_to_slider');
	
function slider_type_columns( $taxonomies ) {
	$taxonomies[] = 'slider_category';
	return $taxonomies;
}
add_filter( 'manage_taxonomies_for_slider_columns', 'slider_type_columns' );
		
	
add_action('init','add_custom_meta_boxes');
function add_custom_meta_boxes(){
	add_action( 'add_meta_boxes', 'slide_heading_meta_box_add' );
	add_action( 'save_post', 'slide_heading_meta_box_save' );
}
function slide_heading_meta_box_add()
{
    add_meta_box( 'slide_heading', 'Custom URL/Heading', 'slide_heading_meta_box', 'slider', 'normal', 'high' );
}
function slide_heading_meta_box()
{
	$custom_metas = get_post_custom( $post->ID );	
	$slide_url = isset( $custom_metas['slide_url'] ) ? esc_attr( $custom_metas['slide_url'][0] ) : '';
	$slide_heading = isset( $custom_metas['slide_heading'] ) ? esc_attr( $custom_metas['slide_heading'][0] ) : '';
	$heading_color = isset( $custom_metas['heading_color'] ) ? esc_attr( $custom_metas['heading_color'][0] ) : ''; ?>		
	<p>
		<label for="fom_link3">URL: </label>
		<input type="text" name="slide_url" id="slide_url" value="<?php echo $slide_url; ?>" size="34" />
		
		<label for="fom_link3">Heading: </label>
		<input type="text" name="slide_heading" id="slide_heading" value="<?php echo $slide_heading; ?>" size="34" maxlength="50" />
	
		<label for="fom_link3">Color: </label>
		<input type="text" name="heading_color" id="heading_color" value="<?php echo $heading_color; ?>" size="5" maxlength="10" />
	</p><?php
}

function slide_heading_meta_box_save($post_id){

	// Bail if we're doing an auto save
    if( defined( 'DOING_AUTOSAVE' ) && DOING_AUTOSAVE ) return;
 
     // if our current user can't edit this post, bail
    if( !current_user_can( 'edit_post' ) ) return;
     
    // now we can actually save the data
    $allowed = array();
	
    // Make sure your data is set before trying to save it	
	if( isset( $_POST['slide_url'] ) ) {
		update_post_meta( $post_id, 'slide_url', $_POST['slide_url'] );
	}
	
	if( isset( $_POST['slide_heading'] ) ) {
		update_post_meta( $post_id, 'slide_heading', $_POST['slide_heading'] );
	}
	
	if( isset( $_POST['heading_color'] ) ) {
        update_post_meta( $post_id, 'heading_color', wp_kses( $_POST['heading_color'], $allowed ) );
	}
}

Step 2)

Now visit the admin side, and you can see your custom post type with the category and extra fields there.

Create a Custom Forgot Password Page In WordPress

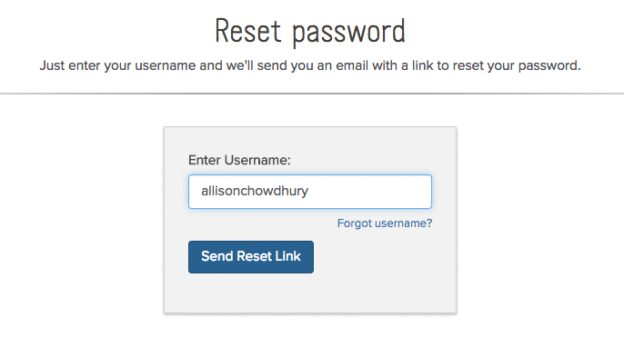
Here we will explain to you how to create a custom forgot password/reset password page in WordPress. This tutorial will help for making the custom front-end page where your subscriber, author, and many other roles of users will change their password to the system.

Step 1)

Make one template page in the WordPress active theme folder and put the below code there.

<?php
/*  Template Name: Forgot Password Template */
get_header();
global $wpdb;
if( (isset($_REQUEST['update_confirm'])) AND ($_REQUEST['update_confirm']='update_confirm') ){

	$newpass=md5($_POST['newpass']);
	$usernameemail=$_POST['useremail'];
	$kkey =$_POST['key'];

	$wpdb->query($wpdb->prepare("UPDATE $wpdb->users SET user_pass='".$newpass."',user_activation_key='' WHERE (user_login='".$usernameemail."' OR user_email='".$usernameemail."') AND user_activation_key='".$kkey."' "));

	echo "<span class='msgg-ok'>Your password has been reset.<br> <a href='/user-login/'>Log in</a></span>";

}

if( (isset($_REQUEST['update'])) AND ($_REQUEST['update']=='update')){
	
	$username_email=$_POST['uemail'];
	
	$Qry = $wpdb->get_results("SELECT user_login,user_email FROM $wpdb->users WHERE user_login='".$username_email."' OR user_email='".$username_email."'");
	if($Qry[0]->user_login != '' && $Qry[0]->user_email != ''){
		$email = $Qry[0]->user_email;
		$user = $Qry[0]->user_login;
		$homeurll=home_url('/');

		$autogenerate_key =crypt($username_email);

		$wpdb->query($wpdb->prepare("UPDATE $wpdb->users SET user_pass='".$newpass."',user_activation_key='".$autogenerate_key."' WHERE (user_login='".$username_email."' OR user_email='".$username_email."') "));


		$mailmsg="Someone requested that the password be reset for the following account:\n$homeurll.\n\nUsername: $user\n\nIf this was a mistake, just ignore this email and nothing will happen.\n\nTo reset your password, visit the following address:\n$homeurll/forgot-password/?action=rp&key=$autogenerate_key&login=$user";


		mail($email,'[The Pacifico Partnership] Password Reset',$mailmsg);

		echo "<span class='msgg-ok'>Check your e-mail for the confirmation link.</span>";

	}else{
		echo "<span class='msg-errr'>Username or Email is not found.</span>";
		$notfound="errror";
	}
}

?>
<?php if($_GET['action']=='rp'){ ?>

<style>
#forget_display{display:none;}
</style>
<?php } 

if((!$_POST) OR ($notfound!='')){

?>

<div id='forget_display'>
<form action='' method='post' onsubmit='return blank_field();'>
<div >  <label>Please enter your username or email address.You will receive a link to create a new password via email.</label><br /><br />
<div> <input name='uemail' type='text' id='uemail' onfocus="if(this.value=='Enter Username/E-mail') this.value=";" onblur="if (this.value=='')
this.value='Enter Username/E-mail';" placeholder='Enter Username/E-mail'/></div> <input type='submit' value='Get New Password'/> </div>
<input type='hidden' name='update' value='update' />

</form>
</div>
<?php }?>

<?php if( (isset($_REQUEST['action'])) AND ($_REQUEST['action']=='rp')) {?>
<div>
<form action="<?php echo home_url('/') ?>?page_id=9" method="post" onsubmit="return blank_pfield();">
<div>
<label>Enter new password:</label><div>  <input name="newpass" type="password"  id="newpass"/> </div></div><br />
<div><label>Repeat password:</label><div>  <input name="repeat-pass" type="password"  id="repeat-pass"/> </div></div><br />
<div><label>&nbsp;</label> <input type="submit" value="Change password" /></div>
<input type="hidden" name="update_confirm"  value="update_confirm"/>
<input type="hidden" value="<?php echo $_REQUEST['login'];?>" name="useremail" />
<input type="hidden" name="key" value="<?php echo $_REQUEST['key'];?>" />
</form>
</div>
<?php }?>

<script>

function blank_field()

{

if(document.getElementById('uemail').value=='Enter Username/E-mail')
{
alert("Please enter username or email");
return false;
}
else
{
return true;
}
}

function blank_pfield()

{

if(document.getElementById('newpass').value=='')
{
alert("Please enter new password");
return false;
}

if(document.getElementById('repeat-pass').value=='')
{
alert("Please enter repeat password");
return false;
}

if(document.getElementById('newpass').value!=document.getElementById('repeat-pass').value)
{
alert("Password do not match");
return false;
}

return true;

}
</script>
<?php get_footer(); ?>
<style>
	.choko_register_box{margin: 0 auto;width: 50%;}
	.choko_register_row_ctn{margin-bottom: 15px;}
	.choko_register_row_ctn label{display: block;margin-bottom: 10px;}
	.choko_register_row_ctn input{width: 97%;border-radius: 0}
	.choko_register_row_ctn select{width: 100%;border-radius: 0}
	.choko_register_error_msg{color: red;margin-bottom: 15px;}
</style>

Step 2)

Now make a forgot password page in wp-admin/add new page. and select the “Forgot Password Template” as a template page. Update your page.

Step 3)

Now visit your page in the front end; it will display the custom forgot password form, where if the user exists, it will send an email link to reset the new password.

Create a Custom Login Page In WordPress

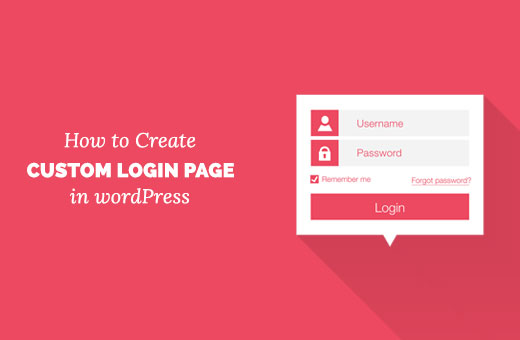
Here we will explain to you how to create a custom login page in WordPress. This tutorial will help for making the custom front-end page where your subscriber, author, and many other roles of users will log in to the system.

Step 1)

Make one template page in the WordPress active theme folder and put the below code there.

<?php
/*  Template Name: Login Template */
get_header();
 

?>
<div class="wrapper">
 	<div class="choko_login_box">
		<form id="login" action="login" method="post" class="choko_login_form">
			<div class="choko_login_msg_ctn"><p class="status"></p></div>		
			<div class="choko_login_row_ctn">
				<label for="username">Username<span>*</span>:</label>
				<input type="text"  name="username" id="username" />
			</div>
	        <div class="choko_login_row_ctn">
				<label for="password">Password<span>*</span>:</label>
				<input type="password"  name="password" id="password" />
			</div>
	        <a class="lost" href="<?php echo wp_lostpassword_url(); ?>">Lost your password?</a>
	        <input class="submit_button" type="submit" value="Login" name="submit">
	        <?php wp_nonce_field( 'ajax-login-nonce', 'security' ); ?>
	    </form>
 	</div>
</div>
<?php get_footer() ?>
<style>
	.choko_login_box{margin: 0 auto;width: 50%;}
	.choko_login_row_ctn{margin-bottom: 15px;}
	.choko_login_row_ctn label{display: block;margin-bottom: 10px;}
	.choko_login_row_ctn input{width: 97%;border-radius: 0}
	.choko_login_error_msg{color: red;margin-bottom: 15px;}
</style>
<script>
	jQuery(document).ready(function($) {
    $('form#login').on('submit', function(e){
        $('form#login p.status').show().text(ajax_login_object.loadingmessage);
        $.ajax({
            type: 'POST',
            dataType: 'json',
            url: ajax_login_object.ajaxurl,
            data: { 
                'action': 'ajaxlogin', //calls wp_ajax_nopriv_ajaxlogin
                'username': $('form#login #username').val(), 
                'password': $('form#login #password').val(), 
                'security': $('form#login #security').val() },
            success: function(data){
            	if(data.loggedin == false){
            		$('form#login p.status').html("<div class='choko_login_error_msg'>"+data.message+"</div>");
            	}else{
            		$('form#login p.status').html(data.message);
            	}
                if (data.loggedin == true){
                    document.location.href = ajax_login_object.redirecturl;
                }
            }
        });
        e.preventDefault();
    });

});
</script>

Step 2)

Now make a login page in wp-admin/add new page. and select the “Login Template” as a template page. Update your page.

Step 3)

In your function.php file, put the below Ajax code for login.

function ajax_login_init(){

    wp_register_script('ajax-login-script', get_template_directory_uri() . '/ajax-login-script.js', array('jquery') ); 
    wp_enqueue_script('ajax-login-script');

    wp_localize_script( 'ajax-login-script', 'ajax_login_object', array( 
        'ajaxurl' => admin_url( 'admin-ajax.php' ),
        'redirecturl' => home_url(),
        'loadingmessage' => __('Sending user info, please wait...')
    ));

    // Enable the user with no privileges to run ajax_login() in AJAX
    add_action( 'wp_ajax_nopriv_ajaxlogin', 'ajax_login' );
}

// Execute the action only if the user isn't logged in
if (!is_user_logged_in()) {
    add_action('init', 'ajax_login_init');
}

function ajax_login(){

    // First check the nonce, if it fails the function will break
    check_ajax_referer( 'ajax-login-nonce', 'security' );

    // Nonce is checked, get the POST data and sign user on
    $info = array();
    $info['user_login'] = $_POST['username'];
    $info['user_password'] = $_POST['password'];
    $info['remember'] = true;

    $user_signon = wp_signon( $info, false );
    if ( is_wp_error($user_signon) ){
        echo json_encode(array('loggedin'=>false, 'message'=>__('Wrong username or password.')));
    } else {
        echo json_encode(array('loggedin'=>true, 'message'=>__('Login successful, redirecting...')));
    }

    die();
}

Step 4)

Now visit your page in the front end; it will display the custom login form.